The easiest way to use a tire changer is to follow the same controlled sequence every time: prepare the work area, remove the old tire, mount the replacement, and complete the final checks. Read the manual for your exact machine and get hands-on instruction before operating it alone. A machine reduces the physical effort, but good results still depend on correct positioning. When a bead becomes difficult to move, stop and correct the setup instead of forcing the tire across the rim.
What to Know Before Using a Tire Changer
A smooth tire change begins before the wheel reaches the turntable. Plan enough clear floor space around the tire changer and balancer and confirm that its capacity suits the work you expect to handle.
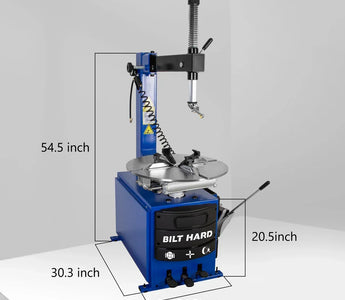
Know the Main Tire Changer Parts
Before operating the machine, identify each component and understand which movement it controls. The exact layout may vary by model, so compare these parts with the diagrams in your machine manual.
|
Tire changer part |
Main function |
|
Bead breaker |
Pushes the tire bead away from the rim |
|
Turntable |
Supports and rotates the wheel during mounting and removal |
|
Clamping jaws |
Hold the wheel from the inside or outside |
|
Mount/demount head |
Guides the tire bead over the rim flange |
|
Swing arm |
Moves and locks the mount/demount head into position |
|
Foot pedals |
Control the bead breaker, clamps, and turntable |
|
Assist arm |
Holds stiff tire beads in the drop center |
|
Inflation system |
Adds air and displays tire pressure |
Check the Tire, Wheel, and Machine
Confirm that the tire’s bead diameter and approved rim width match the wheel. Do not mount a damaged tire on a cracked, bent, heavily corroded, or distorted rim. Clean loose rubber, grit, old sealer, and surface corrosion from the bead seats.
Inspect the machine’s air hoses, electrical cord, guards, jaw covers, bead-breaker pad, mount head protector, and foot controls. Stop if a hose leaks or a protective part is missing. For regular upkeep, follow these tire changer and wheel balancer maintenance checks.
Get Your Tools and Lubricant Ready
Keep safety glasses, close-fitting work gloves, a valve-core tool, approved tire lubricant, the lever specified for the machine, rim protectors, the machine-approved inflation gun or chuck, and an accurate pressure gauge within reach.
Use a commercial bead lubricant that is compatible with rubber. USTMA warns against silicone, petroleum, solvent-based, and flammable mounting substances because they can damage components or create dangerous vapors.
How to Use a Tire Changer Machine
Demounting works best as one continuous process in which each action prepares the wheel for the next. Keep the machine stopped whenever you change the wheel’s position, and watch the bead during the first part of every rotation.
Step 1: Fully Deflate the Tire
Remove the valve cap, take out the valve core, and wait until airflow stops. Press the valve stem briefly and verify that the tire is completely flat before moving it to the bead breaker.
Remove clip-on wheel weights if they could contact the mount head. The completed wheel should still be balanced again after mounting.
Step 2: Break the Bead on Both Sides
Stand the wheel against the machine’s rubber pad. Position the breaker shoe against the tire bead approximately 10 mm from the rim without allowing it to contact the rim. If the wheel has a valve-stem-mounted TPMS sensor, position the sensor away from the breaker shoe. Keep your fingers away from the arm’s path.
Press the bead-breaker pedal, release it, rotate the tire, and repeat until the bead is loose around the full circumference. Turn the wheel over and repeat the process on the second side.
Old tires or assemblies that have not been removed for years can have beads that cling tightly to the rim. Repeated manual force wastes time and raises the chance of marking the wheel. The BILT HARD 110V Large-Capacity Tire Changer has a pneumatic bead breaker rated at about 5,952 lbf at 145 PSI. Its foot control leaves both hands available to position the tire.
It supports 12–23-inch external clamping and 15–26-inch internal clamping, helping it handle a broad range of compatible wheels with less physical effort.
Step 3: Clamp the Wheel on the Turntable
Place the wheel with its normal mounting side facing up unless the wheel or machine manual directs otherwise. Center it before moving the jaws. Select internal or external clamping according to the wheel design, then clamp only on approved contact areas.
Pull firmly on the wheel before rotating the table. If it rocks, sits crooked, or slips, release it and reset the jaws.
Step 4: Set the Mount and Demount Head
Swing the mount/demount head to the rim edge and set the clearance specified in the machine manual. Lock the arm. The head should guide the bead without scraping the rim. Fit the supplied plastic protectors when working on alloy or painted wheels. Confirm that the wheel is centered, firmly clamped, and that the mount/demount head has the clearance specified in the machine manual before operating the turntable.
Step 5: Remove the Upper Tire Bead
Apply approved lubricant to the upper bead and rim flange. Insert the machine-approved lever between the bead and mount head, then lift the bead over the head. Press the section opposite the head into the wheel’s drop center to create working slack. Maintain control of the lever while it is under bead tension and remove it only when it is safe to do so.
Start the turntable slowly. Keep clothing and fingers clear of moving parts. Stop immediately if the bead stretches sharply, the lever jams, or the head touches the rim.
Step 6: Remove the Lower Tire Bead
Lift the tire so the lower bead reaches the mount head. Lubricate again if the surface has dried. Bring the lower bead over the head, keep the opposite section in the drop center, and rotate slowly until the tire clears the rim.
Inspect the removed tire’s inner liner, beads, and sidewalls. Do not reuse a tire with exposed cords, torn beads, bulges, or other structural damage.

How to Put a Tire Back on the Rim
Mounting places increasing tension on the tire as the last portion of each bead crosses the rim. Keeping that tension low and even helps the tire move smoothly without damaging its bead.
Step 1: Check Tire Direction Before Mounting
Read the sidewall before the first bead goes on. A directional tire has an arrow that must point in the vehicle’s forward rotation direction. An asymmetric tire identifies the side that must face outward.
Also confirm the tire size, load rating, and wheel fitment against the vehicle and tire manufacturer’s requirements.
Step 2: Keep the TPMS Sensor Out of the Way
Locate the tire-pressure monitoring system sensor before mounting. It may be attached to, or form part of, the valve assembly. Keep the lever and concentrated bead pressure away from that location.
Inspect the sensor and valve hardware while the tire is off. Replace damaged parts with components approved for that wheel and sensor system.
Step 3: Lubricate the Tire Beads and Rim
Brush a thin, even coat of approved lubricant around both tire beads and the rim’s bead seats. Cover the contact surfaces without allowing excess liquid to pool inside the tire. If the lubricant dries while you work, stop and reapply a small amount. A bead that slides evenly needs less force and is easier to control.
Step 4: Mount the Lower Bead First
Angle the tire over the rim so the lower bead sits below the leading side of the mount head and above the trailing side. Push the bead into the drop center opposite the head. Turn the table slowly without placing your hands under the bead. Stop and reset the tire if the lower bead stops rolling smoothly over the flange.
Step 5: Mount the Upper Bead Slowly
Set the upper bead in the same relationship to the mount head. Keep the opposite section in the drop center using the machine’s assist device, when equipped, or controlled hand pressure applied only from outside the pinch zone. Never place your hands beneath the tire or between the tire and rim. Rotate in short movements until the bead passes over the flange.
After both beads are mounted, follow the machine and tire manuals for inflation. Stay out of the assembly’s trajectory and use only the pressure needed to establish the seal. USTMA says never exceed 40 PSI while seating passenger and light-truck tire beads. If they are not evenly seated at 40 PSI, deflate fully, reposition, relubricate, and try again.
The maximum pressure molded on the tire sidewall is not the vehicle’s normal inflation target. Once the beads are seated, use the vehicle manufacturer’s recommended cold pressure.
Warning: On models equipped with handheld burst inflation, use the device only after receiving proper training. Never direct the inflation outlet toward a person or object, and keep your hands and body away from the tire. Do not use burst inflation to compensate for a mismatched, damaged, improperly positioned, or insufficiently lubricated tire and wheel assembly.
How to Avoid Damage While Changing Tires
Most tire and wheel damage occurs when the machine is asked to overcome poor positioning. Watch how the tire reacts instead of focusing only on finishing the rotation. Small corrections made early can prevent a torn bead or scratched finish.
Keep the Bead in the Drop Center
The drop center is the recessed channel around the middle of the wheel. When the section opposite the mount head sits in this channel, the working side gains enough slack to cross the rim flange.
Watch that section throughout each rotation. If it climbs out, stop the turntable and press it back down before continuing.
Protect Alloy Wheels From Scratches
Use intact plastic covers on the jaws, mount head, bead breaker, and lever wherever the machine provides them. Clean grit from every contact surface before clamping. Set the head clearance from the manual and never use the wheel face as a pry point.
For a valuable or unfamiliar wheel, learn the control sequence on a basic steel wheel first.
Stop if the Tire Starts to Bind
Binding occurs when the bead stops moving smoothly, the sidewall stretches, the machine slows, or the lever becomes trapped. Release the pedal immediately. Reverse only if the manual allows it, then check lubrication, clamp position, head clearance, and drop-center placement.
Use an Assist Arm for Stiff Tires
Low-profile tires and stiff sidewalls can climb out of the drop center while the turntable moves. An assist arm holds controlled pressure on the bead so the operator can focus on the mount head and tire position. The BILT HARD 2 HP Double Assist Arms Tire Changer Wheel Balancer Combo uses two pneumatic assist arms that can apply pressure independently and help prevent bead rollback during mounting.
Its tire changer has a 2 HP motor and handles compatible tires up to 14 inches wide. For stiff or low-profile tires, that support can reduce repeated hand pressure and repositioning, making the mounting cycle smoother.

FAQs
Can You Use a Tire Changer on Run-Flat Tires?
Yes, but only with suitable equipment and training. Run-flat sidewalls are stiff, and an unsuitable machine can cause permanent damage. Bridgestone recommends qualified professionals with proper run-flat equipment.
Can You Change Motorcycle Tires With a Tire Changer?
Yes, if the machine is rated for motorcycle wheels and uses the correct adapters. Follow the motorcycle tire maker’s procedure. Never use passenger-car jaws that cannot hold the narrower wheel safely.
Do Tire Changers Work on All Wheel Sizes?
No. Every machine has limits for rim diameter, wheel width, and tire diameter. Compare each dimension with the machine specifications, and install the required adapters before loading the wheel.
What to Do After Changing the Tire?
Set cold pressure, inspect both bead lines, check for leaks, balance the assembly, reinstall it to the vehicle maker’s torque specification, and complete any required TPMS relearn.
Is a Manual or Semi-Automatic Tire Changer Easier?
A semi-automatic tire changer generally requires less physical effort than a manual tire changer because an electric motor rotates the turntable while compressed air operates the bead breaker and clamping jaws.
Conclusion
Using a tire changer becomes easier when positioning does the work. Fully deflate the tire, loosen both beads, center and clamp the wheel, maintain tool clearance, and keep the working bead in the drop center.
Slow down whenever the bead resists. Correct its position and lubrication before applying more force. After mounting, seat the beads within the tire maker’s pressure limit, set the specified cold pressure, check for leaks, balance the wheel, and confirm that the TPMS is working.