To dry wood without splitting, slow and equalize moisture loss by sealing fresh end grain, raising the wood off the ground, shading the stack, and allowing gentle airflow around every piece. These controls matter whether you are saving boards for a project or preparing firewood, because a dry surface can hide a wet core.
Why Does Wood Split While Drying
Before choosing a drying method, it helps to separate the source of a crack from the place where it first appears. Wood movement is controlled by cellular structure and grain orientation, so two pieces stored under the same conditions may respond differently.
Green Wood Loses Moisture Unevenly
Fresh wood contains water in its cell cavities and cell walls. As the surface dries first and drops below the fiber saturation point, it starts to shrink while the wetter core is still holding its size. That moisture gradient pulls different parts of the piece against one another. If the stress becomes greater than the wood can withstand, a check opens.
End Grain Dries Faster Than the Middle
The ends expose open pathways that run along the grain, so water leaves there much faster than it leaves through the faces. The ends then shrink first. Small cracks can lengthen into deep checks or full splits as drying continues.
Some Wood Species Crack More Easily
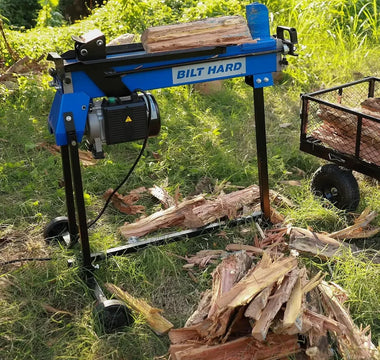
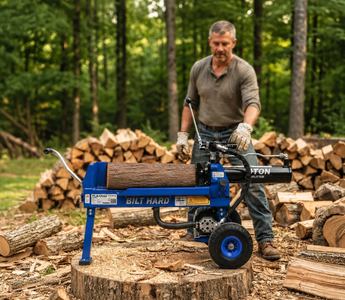
Species differ in density, permeability, grain, shrinkage, and drying rate. Thick stock, flatsawn grain, knots, crotches, and wood near the pith add risk. These pieces can also be difficult to divide into consistent pieces. The BILT HARD 35-Ton Gas Log Splitter pairs a 10 HP 301cc OHV engine with 35 tons of splitting force. It handles logs up to 24 inches long and about 100 pounds, and it works in horizontal or vertical mode.
For large, hard, or knotty rounds, the extra force can reduce repeated handling and help move the wood into a more uniform stacking and drying stage.

How to Dry Wood Without Splitting
A reliable setup manages the whole path from the fresh cut to final use. The following steps are arranged in working order so that each stage supports the next one.
Seal the End Grain Before It Dries
Brush a purpose-made wax-emulsion end sealer over every fresh end. Cover the full end-grain surface and slightly overlap the edges. Apply a second coat if the product directions call for one or if the first coat soaks in unevenly.
Keep Wood Off the Ground
Ground contact keeps the bottom layer damp and restricts air movement. Build the stack on level, durable supports. Concrete blocks topped with straight bunks work for lumber. Pallets or metal rails can support firewood if they are stable and strong enough for the load. Complete cutting and splitting with a log splitter before building the final stack.
Stack Boards With Dry Stickers
Stickers are narrow spacers placed between each course of boards. Use dry, straight stickers of one thickness. Put each row directly above the support below it, including a row near both ends, so the load travels vertically instead of bending the boards.
Spacing depends on board thickness and species. Oregon State University says 18 to 24 inches is generally sufficient for many sizes, while some hardwoods need closer spacing.
Label each board by species and sawing date before stacking so you can track batches without disturbing them
Keep the Stack Out of Direct Sun
Use a roof or top cover that sheds rain and blocks direct sun. Leave the sides open. Extend the cover beyond the stack so runoff does not wet the ends.
Direct afternoon sun can heat one face and accelerate surface drying. A tarp wrapped around the pile causes the opposite problem by trapping humid air. Shade plus open sides gives a steadier drying rate.
Give the Wood Gentle Airflow
Air should move through the stack without blasting one face. If you use a fan indoors, start at low speed and avoid pointing it directly at fresh end grain.
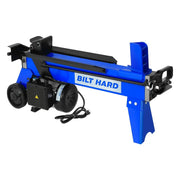
Oversized whole logs are harder to arrange with consistent air gaps. The BILT HARD 14-Ton Electric Log Splitter provides 14 tons of splitting force for logs up to 20 inches long and 16 inches in diameter, using a 120V 15A motor. Reducing larger firewood to easier-to-place sizes helps create more even air channels for natural drying without depending on aggressive airflow at the surface.
Add Weight to Help Keep Boards Flat
Restrain the top courses after the stack is square and fully supported. Use a rigid top panel with stable, evenly distributed weight, or use a purpose-built strapping system. Never balance loose blocks where they can fall.
Weight helps limit warp; it cannot correct missing supports or mixed sticker thicknesses. Recheck the stack after the first few days because green boards may settle.
Check Moisture Before Using the Wood
Do not judge dryness by color, weight, or end cracks alone. Use a calibrated moisture meter and test several pieces from different parts of the stack.
For firewood, split a sample and measure on the newly exposed inner face. For boards, follow the meter maker’s directions for species and temperature correction.
|
End use |
Moisture target or criterion |
Practical check |
|
Indoor hardwood furniture, cabinets, and millwork |
Usually 6% to 8% |
Compare several boards with the expected indoor conditions |
|
Framing lumber |
About 15% average, not over 19% |
Confirm the grade and project requirement |
|
Firewood |
20% or less |
Measure a freshly split interior face |
Note: The lumber figures come from the USDA Wood Handbook chapter on drying. The firewood criterion comes from the EPA’s moisture-meter guidance.
What Are the Common Mistakes That Make Wood Crack
Problems can appear even when most of the setup looks correct. Please audit the few decisions that can undo otherwise careful preparation.
Using Too Much Heat or Strong Airflow
High heat, very dry air, or a strong fan can create a dry shell around a wet core. The USDA hardwood-drying manual identifies drying too rapidly as a cause of surface checks, end checks, internal honeycomb, splits, and cracks. Start gently. Increase drying intensity only after the moisture difference between the surface and core has narrowed.
Stacking Boards Without Enough Support
Wide sticker spacing, misaligned rows, and an uneven foundation let boards sag or twist while they are losing moisture. Support both ends, keep sticker columns vertical, and avoid mixing board thicknesses within one course.
Check the foundation before adding more lumber. A small difference in support height can affect every layer above it.
Building With Wood Before It Is Dry
Wood that is still adjusting to its service environment can shrink after assembly. Joints may open, panels may split, and wide boards may cup.
Once the meter shows a suitable range, move project lumber into the shop and let it acclimate before final milling. Check several boards again before cutting joinery.

What if the Wood Has Already Started Splitting
A checked board is not automatically scrap. Its value depends on the crack’s location, whether the defect is still moving, and whether the finished part will carry a structural load.
Slow Down the Drying Process First
Move the stack out of direct sun and reduce concentrated fan exposure. Do not wrap wet wood airtight. The immediate goal is to reduce the surface-to-core moisture difference while keeping enough circulation to discourage mold.
Watch the crack over the next several days. Mark its endpoint with a pencil so new movement is easy to identify.
Reseal Any Fresh or Exposed End Grain
Coat newly cut ends and any end-grain area where the original sealer has failed. Sealer will not close an existing check, but it can slow additional moisture loss around it.
Wait Before Cutting Away Checked Ends
Mark the current end of each crack and continue controlled drying. A check may extend farther before the board stabilizes, so trimming too early can waste usable length twice.
After moisture readings stop changing, cut beyond the final crack. Reseal the new end if the board still needs more drying time.
Small Cracks Can Be Repaired After Drying
Once moisture is stable, small cosmetic checks can be cleaned and filled with a compatible epoxy or another repair material selected for the final finish.
A filler does not restore the original strength of a structural member. Reject or professionally assess any piece whose split affects load-bearing use.
FAQs
Should You Remove Bark Before Drying Wood?
Usually, for sawn lumber, yes. Bark can slow drying and shelter insects or decay. Firewood bark may stay on, but split the rounds, keep them raised, and leave the stack sides open.
Can a Dehumidifier Help Dry Wood?
Yes, in a controlled drying room or dehumidification kiln. Temperature, humidity, and airflow must suit the species and thickness. A household unit beside an unmonitored stack can still dry surfaces too quickly.
How Long Does Wood Take to Dry?
It varies from weeks to more than a year. Species, thickness, starting moisture, climate, stack design, and final target all matter. Use moisture readings rather than a calendar alone.
Can You Dry Fresh Wood in a Kiln Right Away?
Yes, if the kiln follows a suitable schedule. Some species and thick stock benefit from air-drying first. An aggressive schedule applied to green wood can cause surface checks, honeycomb, or collapse.
Conclusion
Dry wood without splitting by controlling the first stage instead of chasing speed. Seal fresh ends, support every layer, block direct sun and rain, and maintain mild airflow. Then verify the core with a moisture meter before building or burning.
Some checking may be unavoidable in rounds that include the pith or in defect-prone grain. Early sealing and even stacking still protect more usable wood, while consistent piece size makes the drying setup easier to manage from the start. If difficult rounds resist processing, use their dimensions, condition, and grain to choose the splitting force for the wood you process.